


Oakio Reflects on a Successful Journey at BAU 2025
December 14, 2023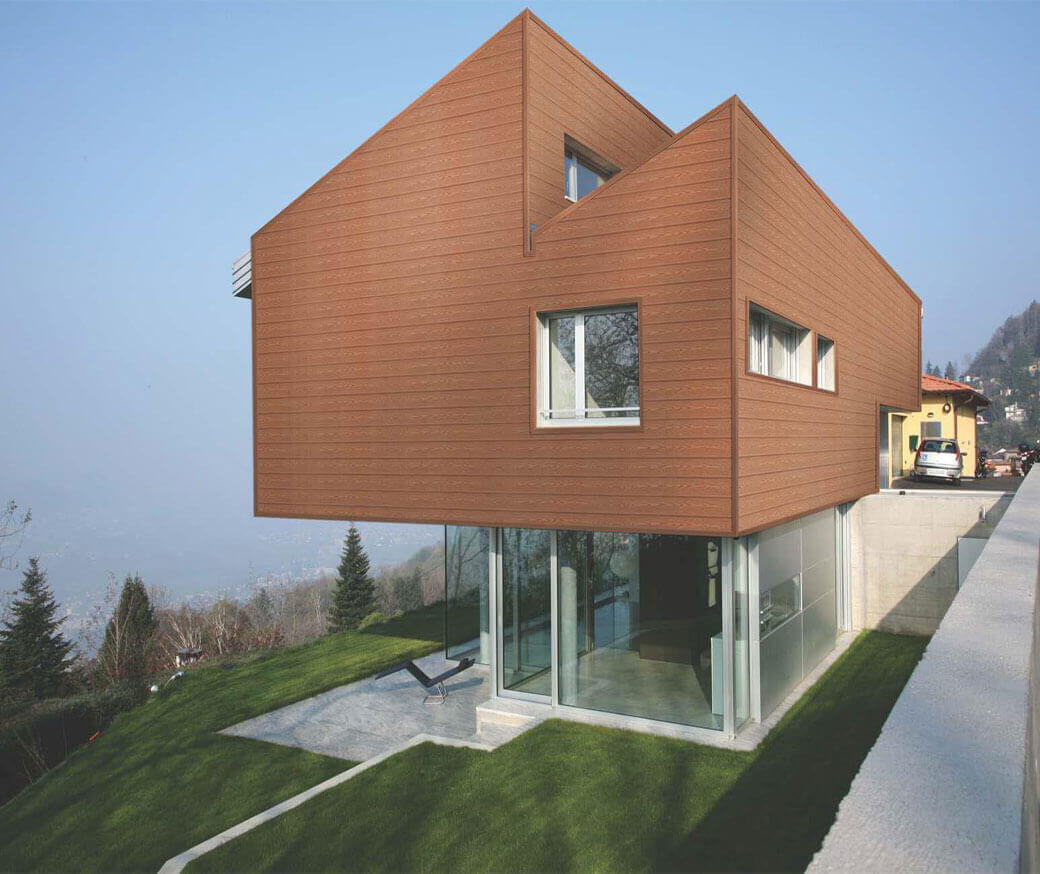
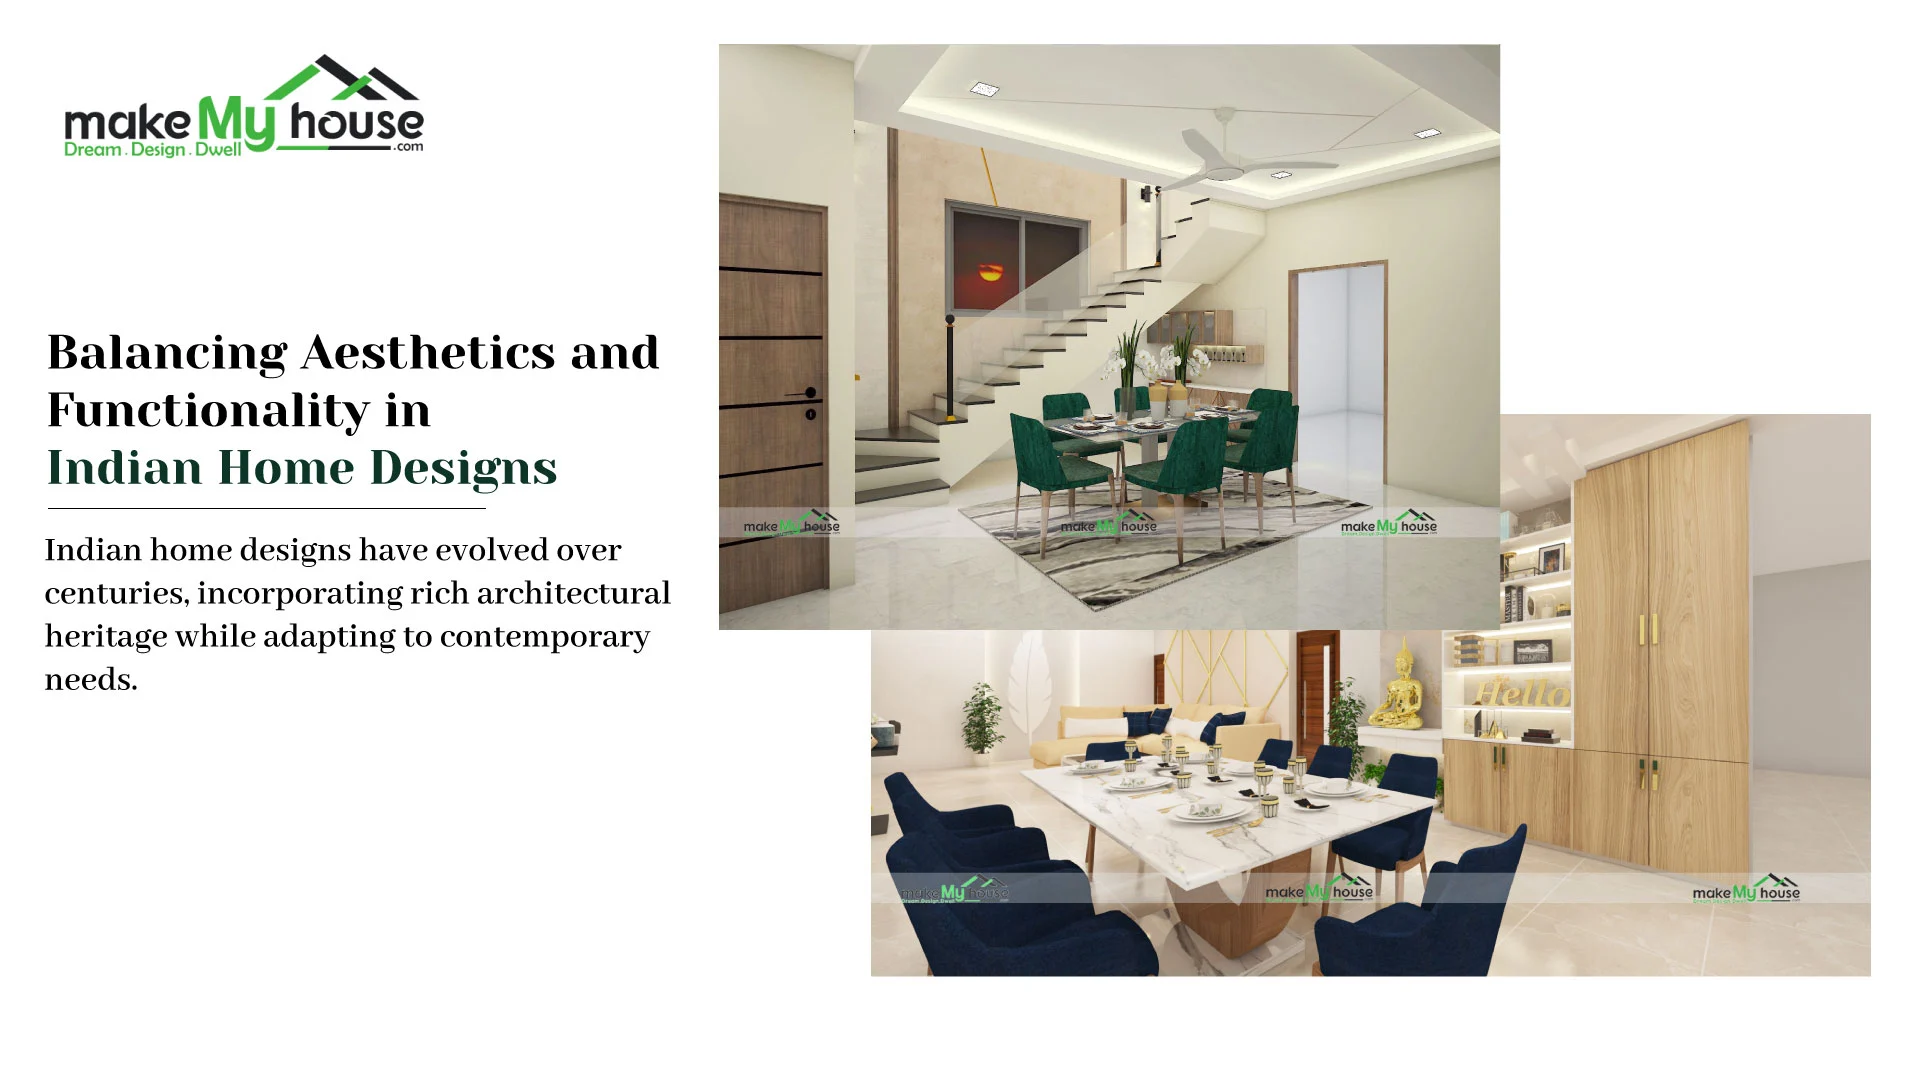
Why Choose WPC wood cladding for your exterior walls
December 20, 2023

”
Have you ever looked at your backyard and thought ‘This space could be so much more than just grass and patio furniture?’ That’s exactly where I found myself last summer before discovering the magic of multi-level decks. Let me tell you, these architectural wonders are like adding multiple rooms to your home – but outdoors!
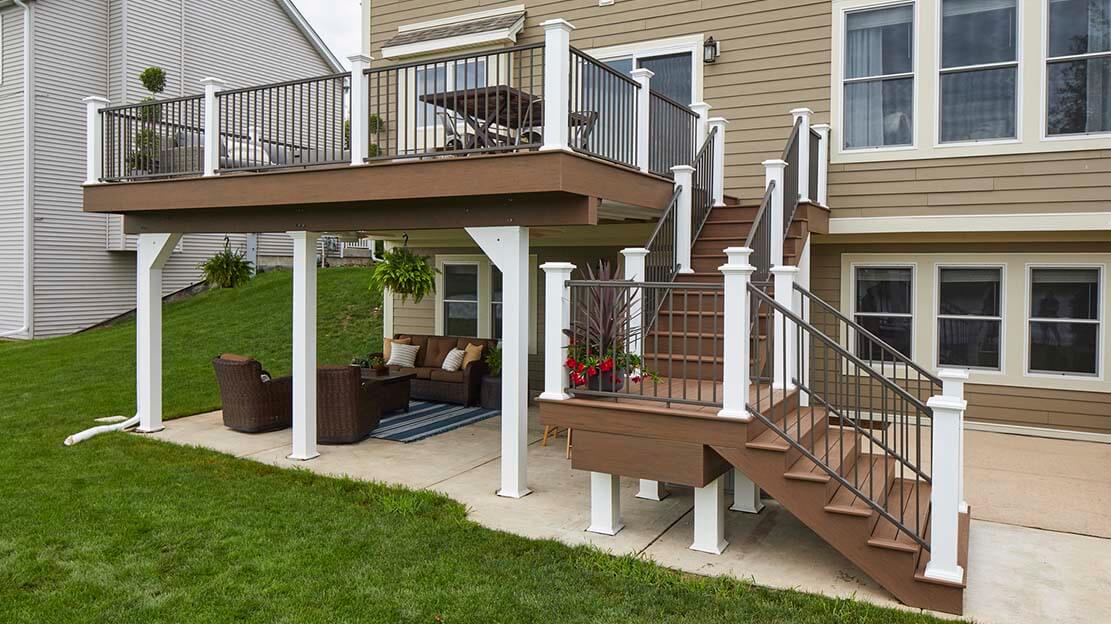
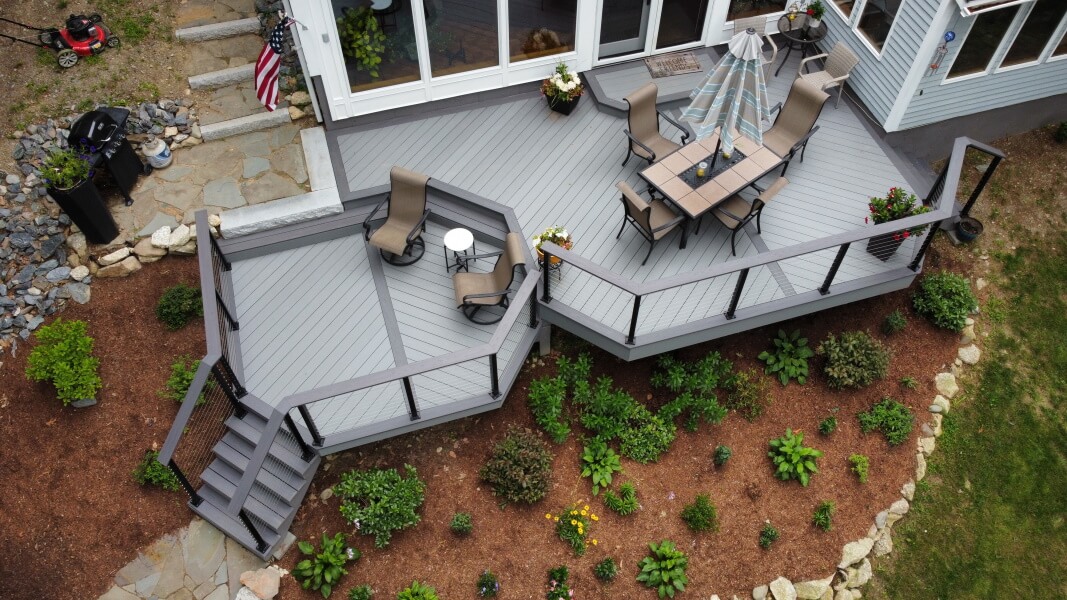
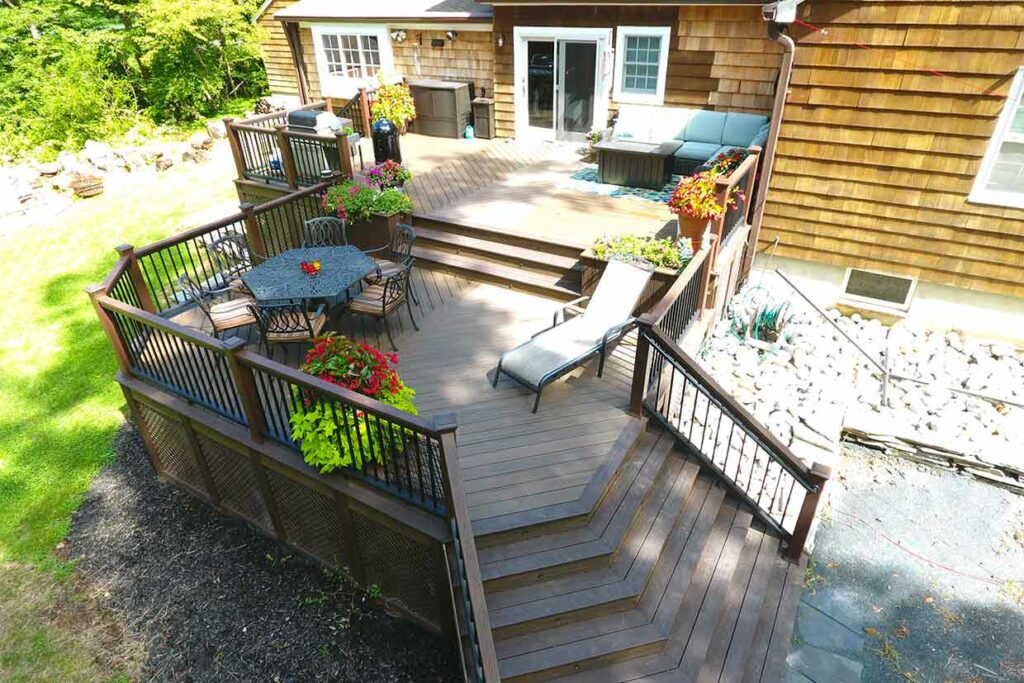
Picture this: A sun-drenched upper deck for morning coffee that flows down to a shaded dining area, then steps leading to a cozy fire pit lounge. This versatile design approach solves the eternal dilemma of wanting separate spaces without sacrificing that open-air feel. I recently helped my neighbor create distinct zones using staggered platforms – their kids now have a play area that’s visually connected but safely separated from the adult conversation pit.
What really surprised me was how these tiered designs actually make small yards feel bigger. By working with the natural slope of your land (rather than fighting it), you create depth and dimension that flat surfaces just can’t match. Pro tip: Use different decking materials or stain colors for each level to visually emphasize the separation – it’s like creating outdoor ‘rooms’ without walls!
Now, I know what you’re thinking – ‘This sounds complicated!’ But here’s the beautiful part: Modern composite materials like those from leading manufacturers make maintenance a breeze. My cousin’s three-tier deck uses weather-resistant boards that still look brand new after three New England winters. The key is planning each level’s purpose from the start – will that middle platform host summer barbecues or become your new container gardening paradise?
When planning your multi-level deck, the first thing I always tell homeowners is to become best friends with their backyard’s natural layout. You wouldn’t believe how many people try to force deck designs that fight against their existing terrain! Start by walking your property at different times of day – that gentle slope you barely notice at noon might become a waterfall during heavy rain. I learned this the hard way when helping a client whose “minor grading issue” turned into an accidental koi pond feature (their fish were thrilled, their warranty wasn’t).
Here’s a pro tip I’ve picked up over the years: Treat each deck level like separate rooms in your house. The upper level might become your morning coffee sanctuary, while the middle tier could transform into an alfresco dining space that actually makes use of that fancy grill you impulse-bought. Don’t even get me started on lower levels – I’ve seen everything from hot tub havens to makeshift outdoor theaters with projector screens!
Now let’s talk safety – the boring-but-crucial stuff that keeps your deck from becoming a viral fail video. Railings aren’t just for looks (though composite materials can make them stylish). I once met a client who wanted glass panels “for the view” until their golden retriever demonstrated why non-slip surfaces matter. Pro tip: Those textured deck boards aren’t just for show – they’re lifesavers when kids come running through with popsicle hands!

Lighting deserves its own shoutout. Solar-powered LEDs along stair edges? Game changer. But here’s what most people miss: layer your lighting like you’re setting mood lighting indoors. Overhead string lights for ambiance, task lighting near cooking areas, and subtle path lights that guide midnight snack runs without blinding neighbors. Trust me, your future self hosting summer parties will thank you!
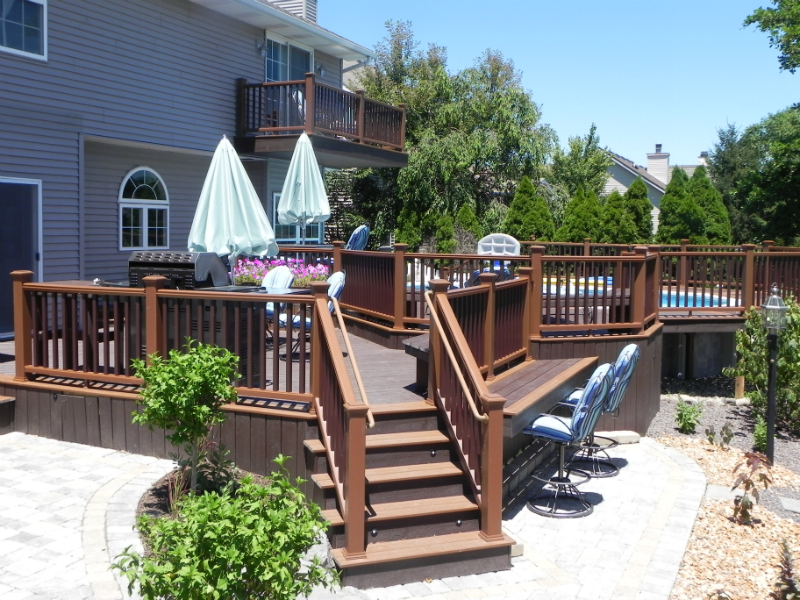
Want to make your backyard work harder? Let me share how we transformed a sloped yard into a functional oasis using tiered decking. The real game-changer was swapping bulky ramps for space-saving stairs – it’s like creating outdoor rooms without losing square footage!
Here’s what works: Built-in benches that double as storage (perfect for hiding pool toys!), staggered platforms connected by wide steps, and different flooring textures to define zones. Pro tip: Use planters as natural dividers between your dining area and lounge space. I learned this the hard way after my first deck design felt like one big blank canvas.
Materials matter too – we used composite decking for the main levels but added stone accents near the fire pit. The secret sauce? Lighting! Solar-powered step lights not only look magical at night but prevent tripping hazards. Anyone else obsessed with creating that perfect evening ambiance?
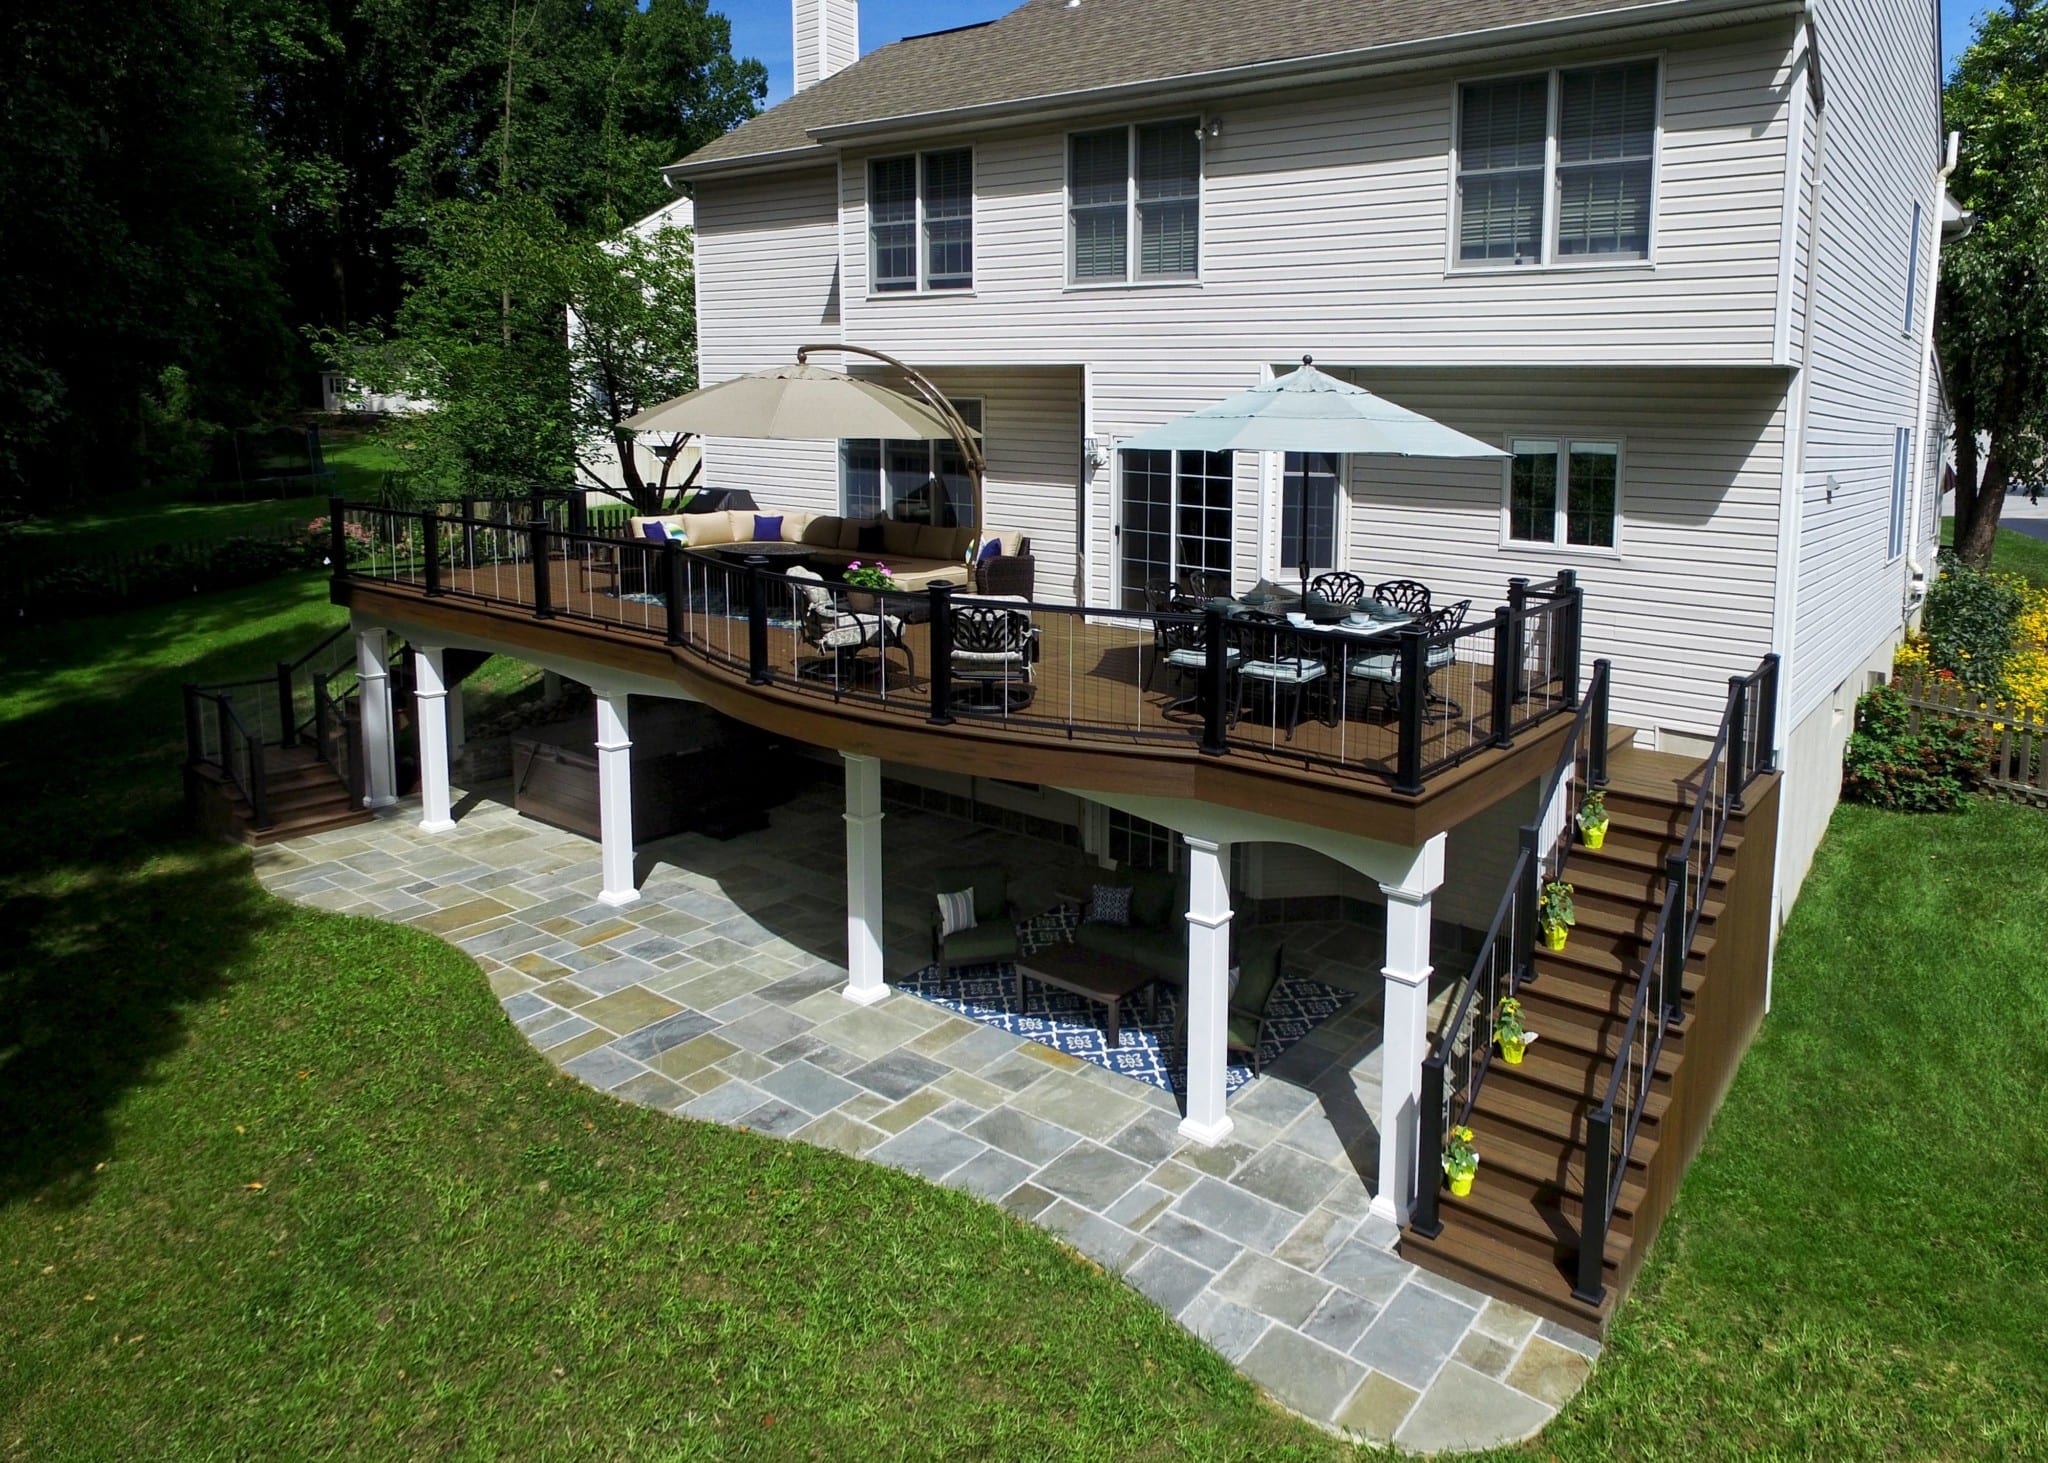
Remember: Your upper deck doesn’t have to mirror the lower level. We made our top tier narrow for dining, while the spacious lower area fits a hot tub and conversation pit. It’s like having separate outdoor living rooms! What would you put on different levels – herb garden? Hammock zone? Let me know in the comments!
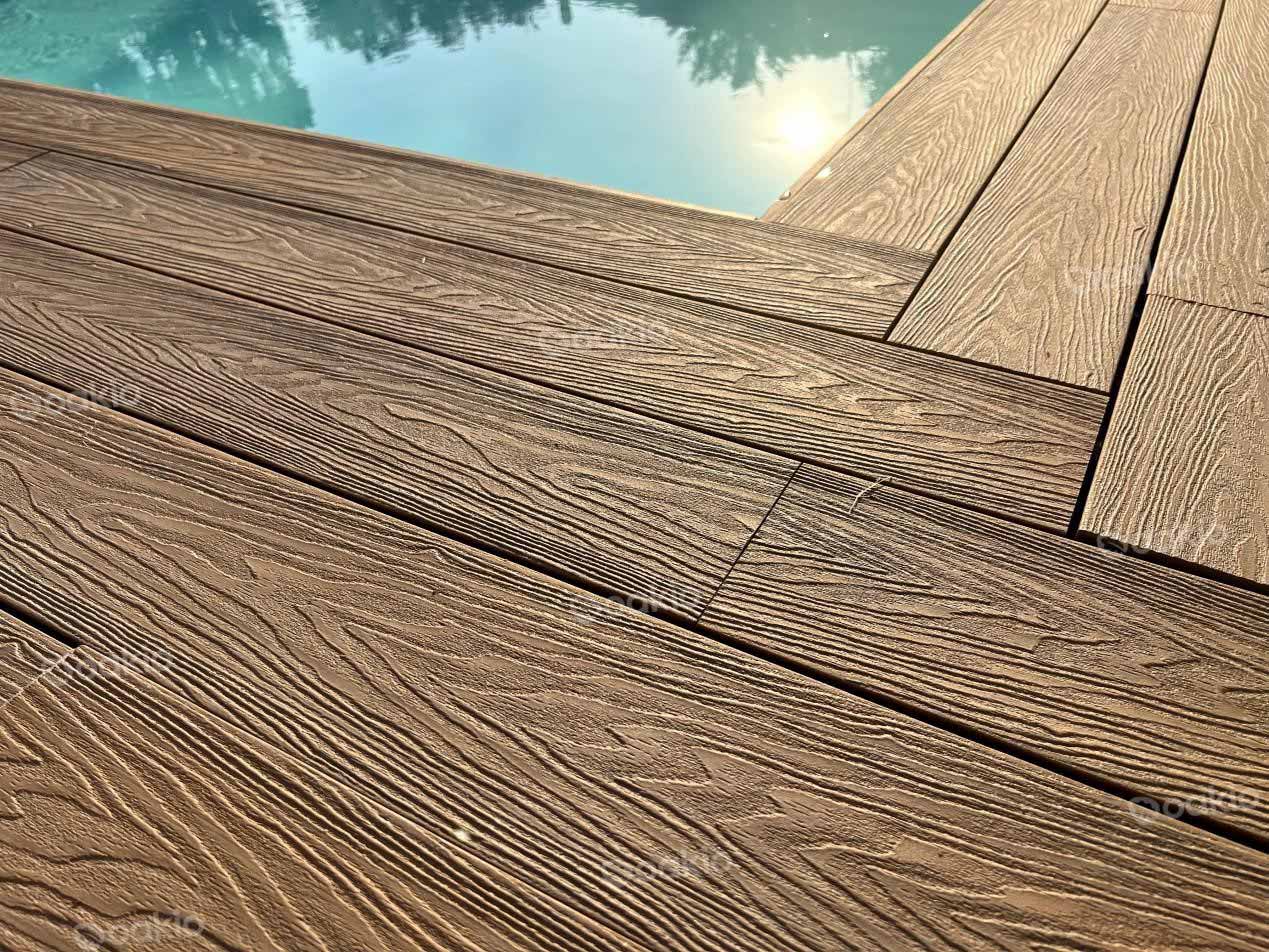
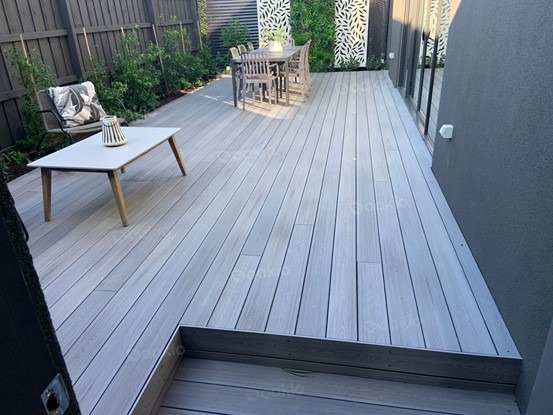
When it comes to deck materials, let me tell you what I’ve learned from helping dozens of homeowners. Oakio’s composite decking has become my top pick for multi-level decks – and no, this isn’t just manufacturer hype. These planks can handle whatever Mother Nature throws at them without warping or splintering. I recently saw an Oakio deck that survived three New England winters looking as fresh as installation day. The best part? You get realistic wood textures without the annual maintenance headache. They offer about 12 different color options ranging from rich mahoganies to cool contemporary grays.
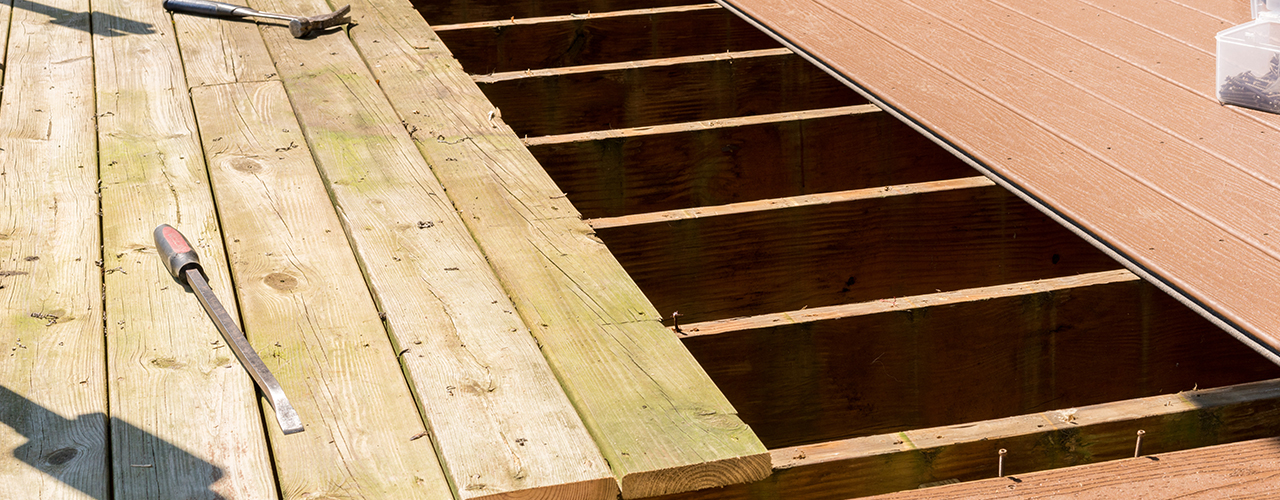
Now, if you’re watching your wallet, pressure-treated pine might tempt you. It’s about half the price upfront, but here’s the catch – you’ll be power-washing and resealing every spring. I’ve seen too many decks turn gray and splintery within two years without proper care. Pro tip: If you go this route, set calendar reminders for maintenance!
Weather resistance is where the rubber meets the road. Composite materials like Oakio’s resist moisture damage that can literally eat through traditional wood over time. Ever seen deck boards curl up like potato chips after a rainy season? That’s what we’re trying to avoid. For coastal areas or places with heavy rainfall, composites are practically mandatory.
Here’s something most contractors won’t tell you: The right material choice can actually increase your home’s value. I’ve had clients recoup up to 80% of their deck investment at resale when using premium materials. Think of composite decking as the smartphone of outdoor surfaces – slightly pricier initially, but way smarter in the long run.
One last thing – don’t forget about surface temperature! Some dark-colored composites can get hot underfoot. Oakio’s lighter tones stay surprisingly cool, even in direct sunlight. Why settle for boring brown when you could have a deck that complements your home’s exterior?
When it comes to multi-level deck ideas, the possibilities are as varied as your backyard BBQ playlist! I’ve seen homeowners create everything from tropical retreats to modern minimalist spaces – it’s all about matching your lifestyle. My favorite trick? Using different themes for each level like a cozy firepit lounge on the lower tier and a dining area with pergola shade up top.
Picture this: Stringing up weatherproof LED lights through a cedar pergola while integrated bench lighting creates magical ambiance. Pro tip – solar-powered path lights along the stairs not only look gorgeous but prevent midnight stumbles! Check out how this clever design uses layered lighting to highlight different zones.
Ever thought about turning your deck into an outdoor movie theater? I helped a client add retractable shades and built-in speakers on their top level – now they host summer film nights with projector lighting that dances across the railings. The secret sauce? Combining practical shade solutions with showstopping lighting effects that work harder than your patio umbrella!
Budgeting Smart for Your Dream Deck
Let’s talk dollars and sense – because let’s face it, budget conversations can make or break your deck dreams. From my experience helping neighbors plan their outdoor spaces, three big factors really steer the ship: how much square footage you’re covering, whether you’re going for basic or bougie materials, and those fancy design elements that make architects drool.
Here’s the kicker – that gorgeous curved staircase or custom lighting plan you saw on design blogs might add 20-30% to your bottom line. But before you panic, remember this: investing in pros for complicated builds often pays off. My buddy Jake tried to DIY his three-tiered deck and ended up paying triple in fix-it costs!
Material choices are where it gets interesting. While pressure-treated wood might look cheaper upfront (we’re talking maybe $15-20/sq ft), composite options like those new textured boards everyone’s raving about could save you hundreds in maintenance over five years. Pro tip: Mix materials strategically – use premium decking where people actually walk, and save budget-friendly options for less visible areas.

Here’s something most homeowners don’t consider: Good contractors actually help you save. They’ll spot potential code issues before they become expensive mistakes and often get material discounts that cover their fees. Does this mean you should DIY everything? Heck no! But maybe handle the staining yourself later to offset costs.
Remember that time I helped my sister plan her deck? We saved nearly $4k by simplifying the railings and focusing splurges on the main entertainment level. The moral? Prioritize what matters most to YOUR family’s lifestyle. After all, that’s what turns a generic deck into YOUR personal oasis.
Wrapping up our deck discussion, let me share something I’ve learned from helping neighbors with their backyard projects: that final 10% of planning makes 90% of the difference. You know that moment when you’re staring at your almost-finished deck and realize the stairs feel just slightly awkward? That’s where bringing in a pro pays off – they spot what our DIY eyes might miss.
When I helped the Smiths down the street with their three-tiered deck, their contractor caught that their planned built-in bench would block the sunset view from the lower level. A simple material switch to transparent railings saved the whole design! Which brings me to my next must-share tip…

Materials matter more than you’d think. That gorgeous tropical hardwood might look stunning in photos, but are you ready for quarterly sealing treatments? My cousin learned this the hard way – switched to composite decking after year two of maintenance headaches. “Should’ve listened to the builders from the start,” he always says now.
Here’s the golden trio I keep seeing in successful projects: safety first (nobody wants a slippery surprise after rain), function that flows (how does moving between levels feel with a tray of drinks?), and that wow factor that makes you actually use the space. Pro tip: LED stair lighting isn’t just pretty – it prevents midnight stumbles!
Budget talk – let’s keep it real. Yes, you can save some cash doing parts yourself. But when it comes to structural elements? Worth every penny to get it right. Remember: A well-built deck becomes part of your home’s value. Shoddy work? That becomes next year’s headache.
Final thought from my deck-obsessed uncle: “Your deck should hug your landscape, not fight it.” Whether you’re working with a hillside or flat yard, let the pros help you make friends with the terrain. Now, who’s ready for backyard margaritas on their new multi-level oasis?
Wondering about those stacked outdoor spaces everyone’s raving about? Let’s break down the FAQs I get asked most when neighbors spot my two-tiered deck. First off – yes, that cool staggered structure with built-in benches is what we call a multi-level deck. Think of it like a outdoor room system where each platform serves different purposes – maybe grilling on the lower level while the upper floor becomes your sunset-watching perch.
Now about costs – from my experience helping with a friend’s DIY project, materials alone could eat up anywhere between a decent used car payment to a tropical vacation budget. The game-changer? Whether you’re using composite boards that laugh at rainstorms or standard wood needing yearly TLC. Oh, and those fancy railings with lighting? They add about 20% to the bill but are worth every penny when you’re navigating steps after dark.
Can you DIY it? Sure, if you’ve got weekends to spare and don’t mind becoming best friends with your level tool. My cousin learned the hard way that what works for a single platform becomes 3D chess when adding stairs and load-bearing posts. Pro tip: At least consult a structural engineer – that $500 fee saved me from what could’ve been a very expensive collapse during last year’s BBQ bash!