What Is Vertical Composite Fencing
June 13, 2022
WPC Manufacturers in China: Exploring Innovation and Development of Industry Leaders
June 17, 2022After 15 years in the decking installation business, I’ve learned that success lies in the details. In this guide, I’ll share my professional insights on WPC (Wood-Plastic Composite) decking installation, focusing on common challenges and practical solutions that I’ve encountered throughout my career.
Pre-Installation Preparation
Material Acclimation

One of the most critical yet often overlooked steps is material acclimation. Here’s what you need to know:
- Store materials on-site for 48-72 hours before installation
- Keep boards laid flat on a level surface
- Maintain consistent temperature and humidity during acclimation
- Use proper support every 24 inches to prevent warping
Site Assessment and Preparation
Ground Conditions
- Ensure proper drainage with a minimum 1/4 inch per foot slope
- Clear vegetation and apply weed barrier fabric
- Install adequate drainage systems for covered areas
Substructure Requirements
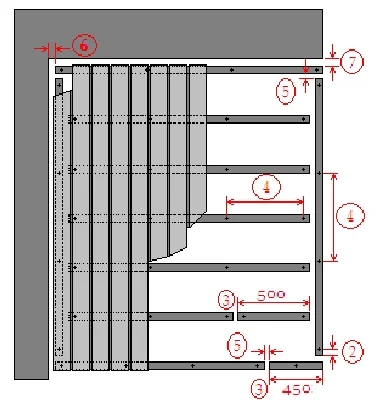
- Maximum joist spacing: 16 inches on center for residential, 12 inches for commercial
- Ground clearance: minimum 6 inches from the ground to the bottom of joists
- Use pressure-treated lumber rated for ground contact
- Install blocking between joists every 4-6 feet for additional stability
Installation Process
1. Framing and Support Structure

Critical measurements:
- Beam spacing: maximum 6 feet on center
- Post depth: below frost line (location dependent)
- Ledger board attachment: use proper flashing and waterproofing
Common mistakes to avoid:
- Inadequate post foundation
- Improper ledger board attachment
- Missing joist hangers
- Insufficient blocking
2. Joist Preparation
Essential steps:
- Apply joist tape to prevent premature decay
- Install additional blocking for picture framing
- Double up joists under seams
- Use proper grade structural screws
3. Board Installation
Starting Line
- Begin with a full-width board
- Use chalk line for perfect alignment
- Install starter clips according to manufacturer specifications
- Ensure the first board is perfectly straight – this affects the entire installation
Proper Spacing
Temperature considerations for gap spacing:
- Below 40°F: 1/4 inch gap
- 40-70°F: 3/16 inch gap
- Above 70°F: 1/8 inch gap
4. Special Considerations
Pattern Work
When creating patterns:
- Calculate material needs with a 10% waste factor
- Pre-plan all cuts
- Use templates for complex designs
- Consider board direction for drainage

Picture Framing
- Double-up frame board support
- Miter corners at 45 degrees
- Allow proper spacing for expansion
- Install additional blocking at corners
Advanced Techniques
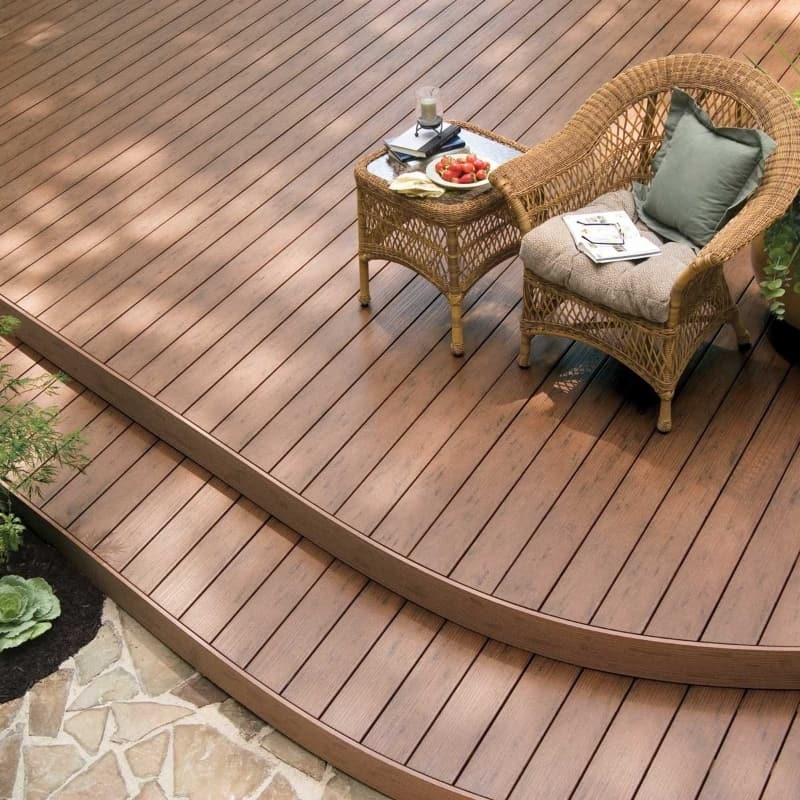
1. Curved Decking Installation
For curved designs:
- Use flexible PVC trim for curved borders
- Create templates for complex curves
- Install additional joists on curves
- Use heat bending techniques when necessary
2. Inlay and Feature Strips
Creating custom designs:
- Plan pattern layout beforehand
- Use contrasting colors effectively
- Install additional support underneath
- Consider expansion in different directions
Common Problems and Solutions
1. Surface Issues
Scratches and Scuffs
Prevention:
- Use proper furniture protectors
- Install materials with grain direction in mind
- Maintain clean work environment during installation
Repair:
- Light sanding for minor scratches
- Heat gun treatment for deeper scratches
- Board replacement for severe damage
Color Fading
Prevention:
- Use UV-resistant materials
- Consider covered areas for sensitive colors
- Proper cleaning and maintenance
2. Structural Issues
Board Movement
Causes:
- Improper fastener spacing
- Missing expansion gaps
- Incorrect joist spacing
- Temperature fluctuations
Solutions:
- Reinstall with proper gaps
- Add additional fasteners
- Adjust for seasonal changes
Water Damage
Prevention:
- The proper slope for drainage
- Adequate ventilation
- Proper flashing installation
- Regular gutter maintenance
Maintenance Guidelines
Regular Maintenance Schedule
Quarterly:
- Inspect for loose boards
- Check fasteners
- Clean between boards
- Inspect structural integrity
Annually:
- Deep cleaning
- Structural inspection
- Fastener tightening
- Sealer application (if required)
Cleaning Techniques
Proper cleaning methods:
- Sweep regularly
- Use approved cleaners
- Pressure wash carefully (max 1500 PSI)
- Address stains immediately
Tool and Material Checklist

Essential Tools:
- Circular saw with fine-tooth blade
- Power drill with proper bits
- Laser level
- Chalk line
- Tape measure
- Speed square
- Rubber mallet
- Hidden fastener installation tool
- Safety equipment (goggles, gloves, dust mask)
Materials:
- WPC decking boards
- Hidden fasteners
- End clips
- Joist tape
- Structural screws
- Blocking materials
- Flashing
- Fascia boards
Professional Tips
- Weather Considerations
- Ideal installation temperature: 60-70°F
- Avoid installation in extreme temperatures
- Plan for proper ventilation
- Material Storage
- Store on a flat, dry surface
- Cover with breathable material
- Support every 24 inches
- Keep away from direct sunlight
- Installation Efficiency
- Pre-drill when necessary
- Use chalk lines for alignment
- Keep consistent spacing
- Work in small sections
- Quality Control
- Check board straightness before installation
- Inspect for damage before cutting
- Maintain clean cuts
- Regular tool maintenance

Conclusion
Success in WPC decking installation comes from attention to detail and proper planning. While this guide covers many aspects of installation, each project has its unique challenges. Always consult local building codes and manufacturer specifications before beginning your project.
Remember: The extra time spent on proper preparation and installation will save hours of troubleshooting and repairs in the future.
Additional Resources
- Local building codes and permits
- Manufacturer installation guides
- Professional decking associations
- Weather and climate data for your region
